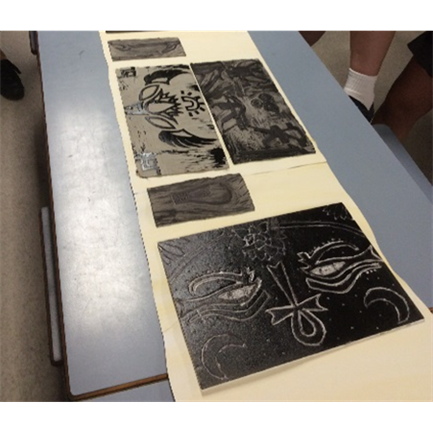
Compositions within landscapes – Part 3 – Printmaking
Students are introduced to the concept of appropriation through print making. Students will study three artists and create a body of work.
Outcomes
- 4.1 uses a range of strategies to explore different artmaking conventions and procedures to make artworks.
- 4.2 explores the function of and relationships between the artist - artwork - world - audience.
- 4.3 makes artworks that involve some understanding of the frames.
- 5.1 develops range and autonomy in selecting and applying visual arts conventions and procedures to make artworks.
- 5.2 makes artworks informed by their understanding of the function of and relationships between the artist - artwork - world - audience.
- 5.3 makes artworks informed by an understanding of how the frames affect meaning.
Duration
2-3 weeks.
Driving question
How do artists use appropriation in artworks?
Content
Students follow the practice of lino printing and appropriate techniques to layer an artwork into an appropriated composition, shaping meaning through referencing art history.
- Work, employment and enterprise
- Civics and citizenship.
Assessment
All activities require students to demonstrate their learning and are all assessment for learning activities.
Teaching and learning activities
Students will:
- explore the concept of appropriation through the Appropriation worksheet (PDF 5,422 KB).
- compare the similarities and differences between the images of The Great Wave off Kanagawa 1832.


- Questions to discuss;
- Is the artwork significant to you?
- the connections to Japanese culture in the class
- have any students travelled and seen the landmark?
- does the artwork remind them of an experience they had in a boat or on the sea?
- does it recall a dream or resemble an image they have previously seen?
Write a reflection in their visual arts process diaries.
Students will:
- draw up a KWL (What I know/ What I want to know/ What I have learned) table under the heading 'Printmaking'
- complete the What I know column
- watch Introduction to printmaking
- fill in the What I want to know column
- take notes when going through the PowerPoint Intro to printmaking
- fill in the What I have learned column.


Following the steps below, students will appropriate image one.


Image one: bit.ly/2zr1hqu
Students will
- Sketch a design their visual arts process diary to the specified size of the available lino to be used for printing.
It is recommended that the design size of stage 4 does not exceed 15 x 15 cm.
- Select a 'shape' that could be used or found within The great wave off Kanagawa.
- Identify and copy the patterns and lines in the artwork original artwork.
Step 2 and 3 will be used in their lino print design. Reinforce that their design will be 2-dimensional and printed in black and white contrast. You can use examples from the slideshow above to explain and demonstrate this to students.
- Use carbon paper to colour the back of their design using a graphite pencil, tracing their image onto the surface of the lino.
- Remove the carbon paper and refine the design using a thick permanent marker.
It is essential that you demonstrate correct lino cutting procedures before allowing students to complete the exercise below. You must consistently monitor students when using cutting devices, including counting out and back any equipment at the beginning and end of the lesson.
- Apply pressure to the surface using your spare hand behind your cutting hand.
- Cut away from you and glide along the surface.
- Cut one segment at a time and manipulate the textures that are cut away to reinforce the shape of the design. (Even those these will appear white, in printmaking, the residue will still print in on spare areas cut away.)
- For more comfortable cutting, heat the lino using an iron on the back of the material.
Monitor student cutting of lino following WHS policies and procedures within the classroom.
Written responses are documented and shared within collaborative discussion facilitated by the teacher.
Students are to:
- document the process of their artmaking within a journal. This can be their visual arts process diary or an online blog through sites such as Google classroom.
- photograph or sketch the process used
- write a response about the process.
Differentiation
Extension
Students are to:
- find and research another appropriated artwork
- investigate the composition and it's meaning
- using the lino design from before, recreate a painting and print over.
Life skills
Outcomes
- LS 9 uses a range of materials, techniques and processes to make artworks.
Students are to:
- draw a design onto a piece of foam
- transfer the design onto another artwork.
An example of a foam board can be seen below.


Evaluate
Feedback is formative for the duration of the project.
Syllabus
Please note:
Syllabus outcomes and content descriptors from Visual Arts 7–10 Syllabus (2003) © NSW Education Standards Authority (NESA) for and on behalf of the Crown in right of the State of New South Wales, 2017.